使用 OpenCV 矫正图片
在矫正图片之前需要先加载 OpenCV 库
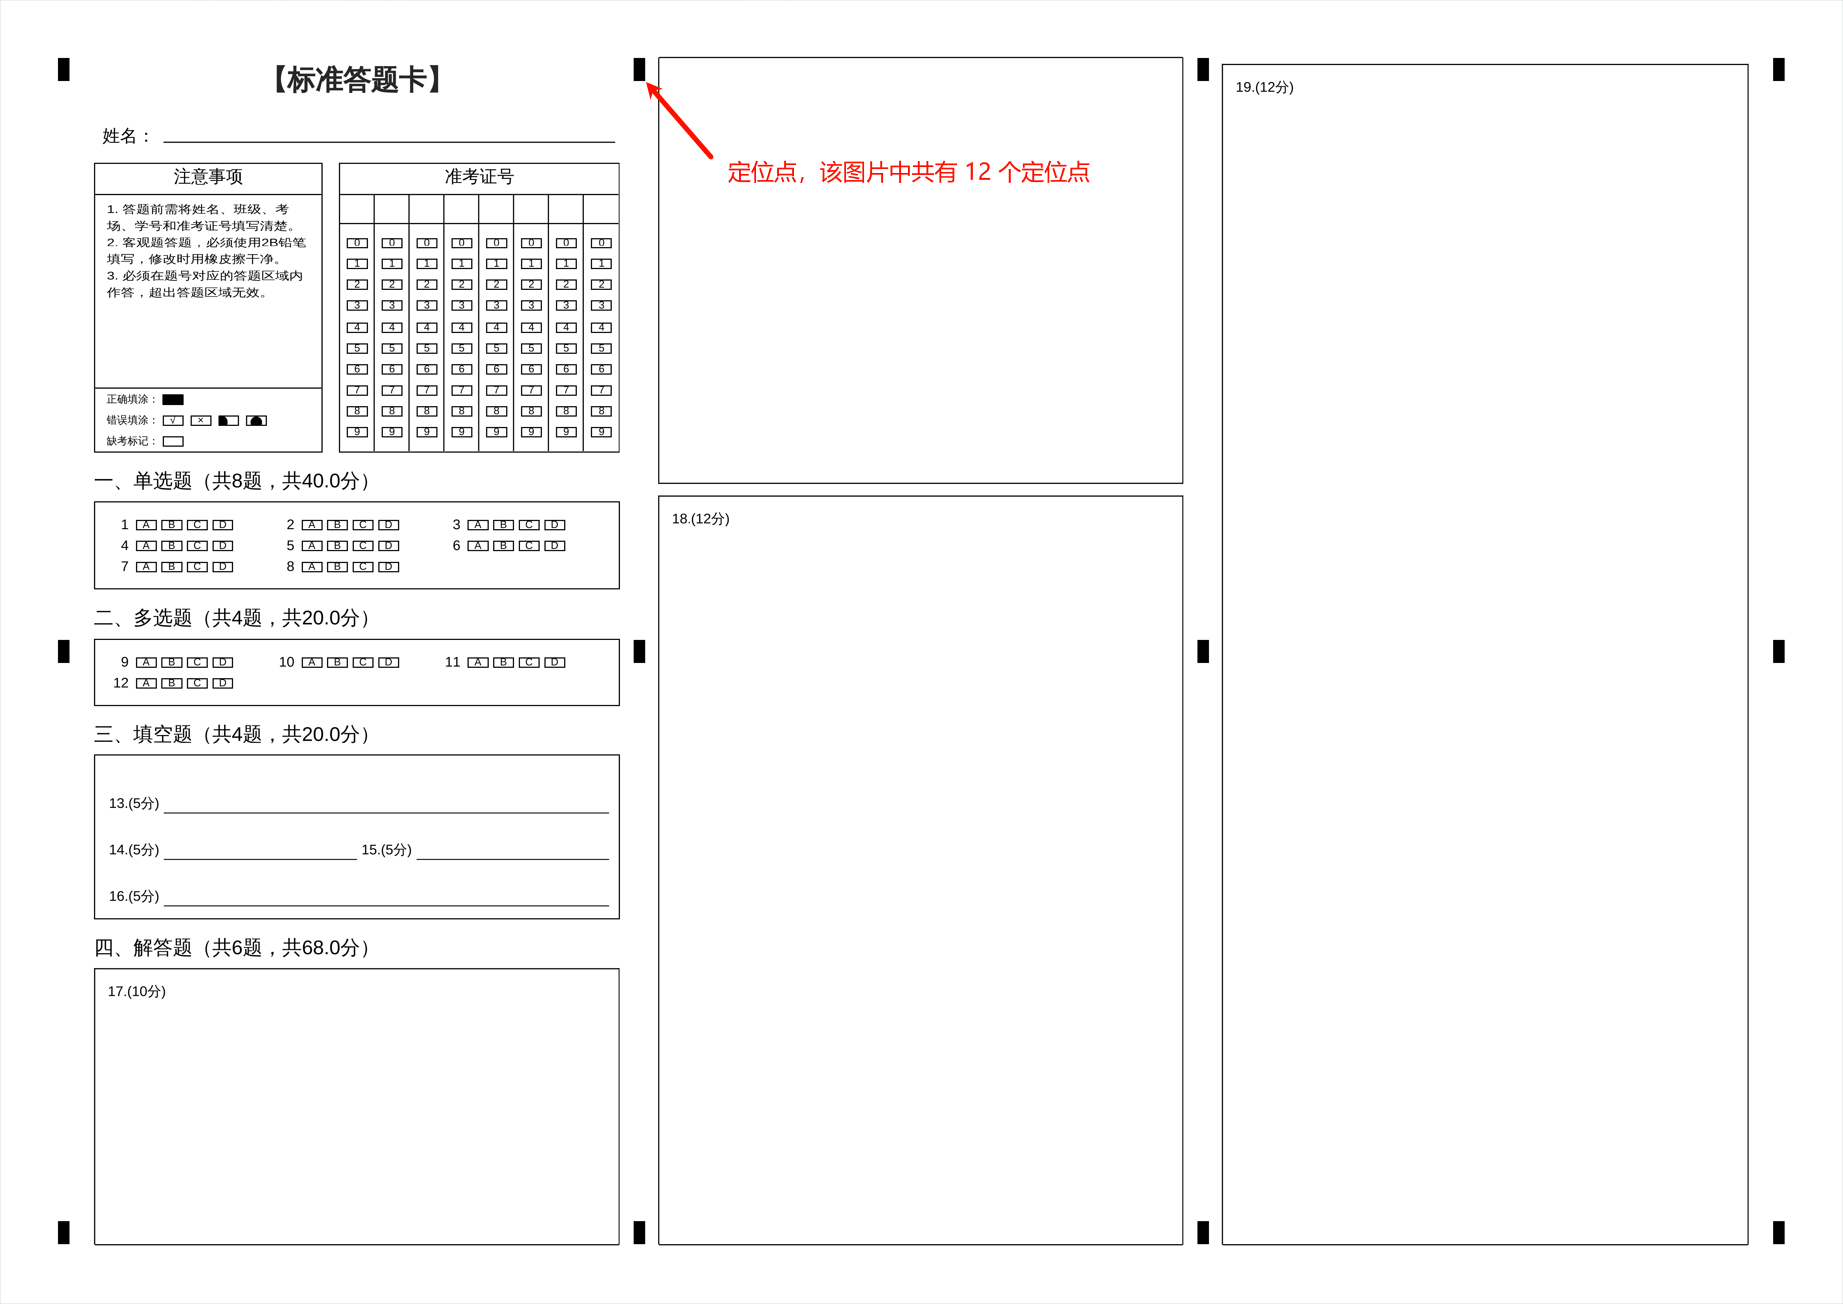
原图示例:

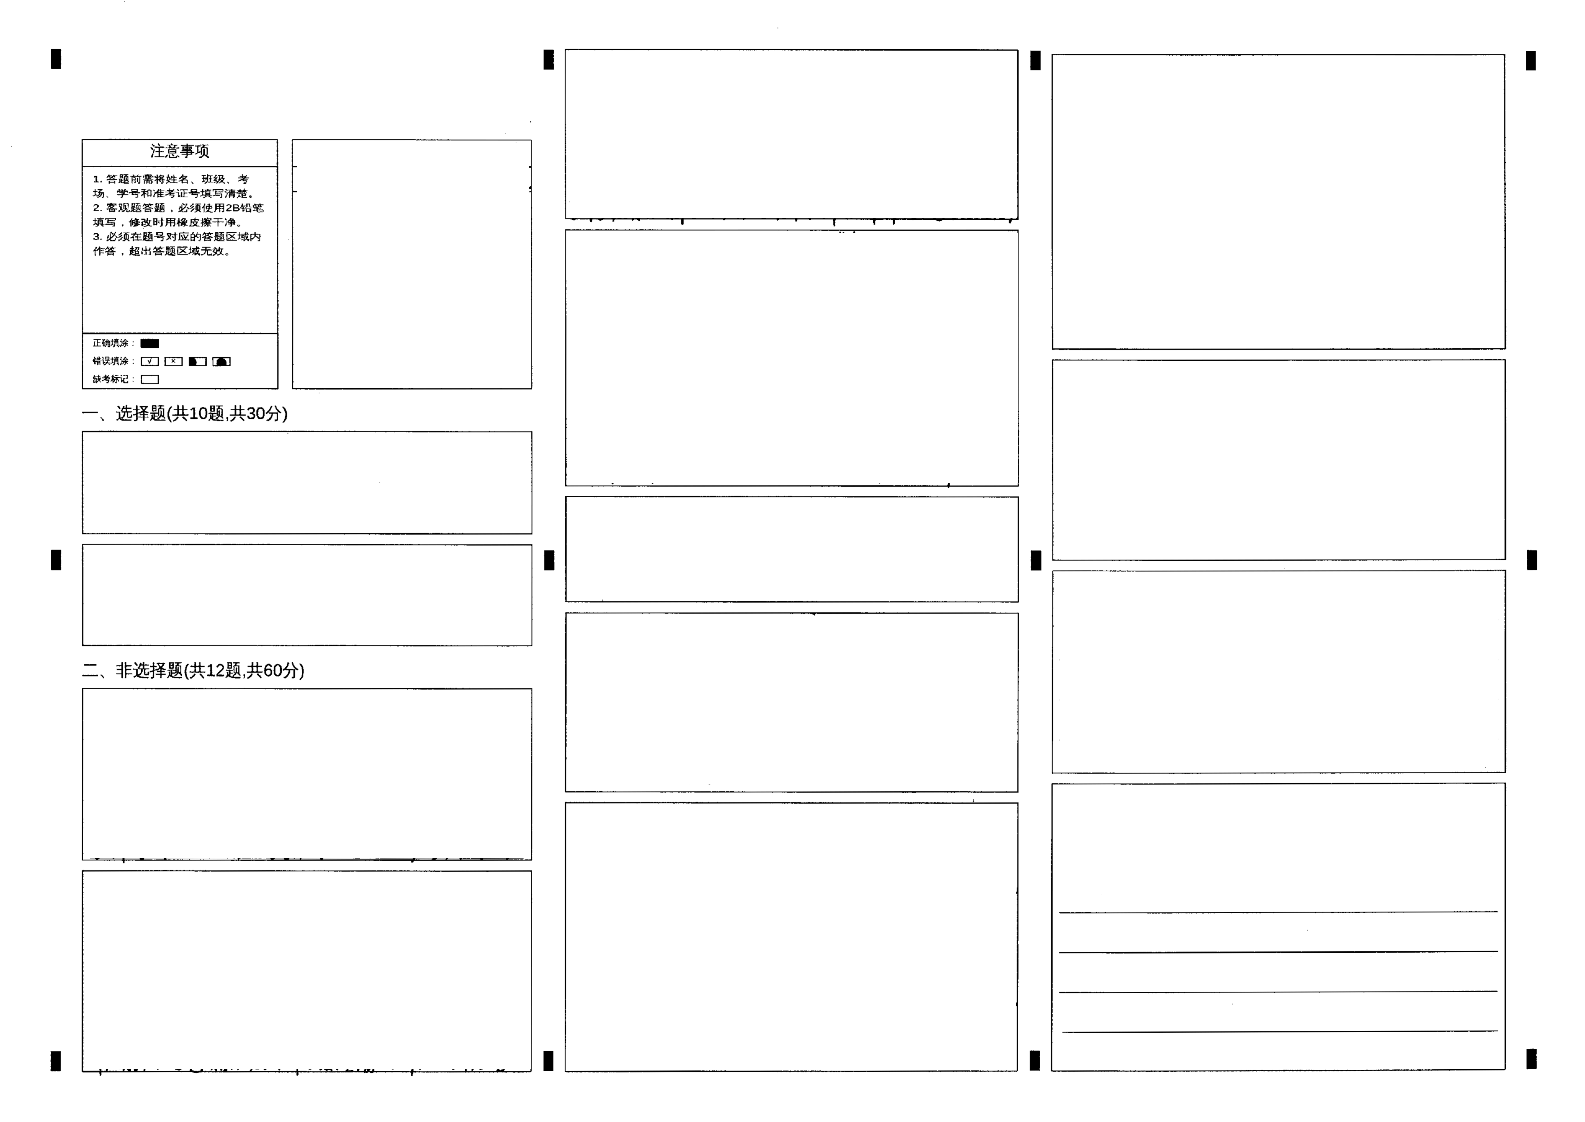
矫正图示例(定位点位置相同即可):

流程概要
- 明确定位点的样式,比如定位点的长、宽、像素信息等。
- 如果有原图则从原图读取定位点位置。
- 从需要矫正的图片中读取定位点的位置。
- 因为矫正图片的其他位置可能出现类似的定位点信息,所以需要过滤读取出来的定位点信息。
- (可选)如果读取出来的定位点数量不足,将需要矫正的图片进行去噪处理,使用去噪后的图片从第三步开始。
- 如果需要矫正的图片出现定位点缺失,使用不同的矫正算法进行矫正。
从需要矫正的图片中读取出来的定位点越多,矫正后的图片越接近原图。
提示
使用中值滤波去噪时选择 ksize 的技巧
- 较小的 ksize(如 3 或 5)适合处理细微噪声,保持图像细节。
- 较大的 ksize 会更强烈地平滑图像,但可能会导致细节丢失。
- 一般来说,ksize 的选择取决于图像的噪声类型和处理需求。
关键方法的代码实现
获取定位点信息
提示
需要矫正的图片的长宽要和获取定位点的原图的长宽一致,这样定位点的信息才是准确的。
Scan.java
@Data
public class Scan {

  private int width;
  private int height;
  private int originalWidth;
  private int originalHeight;
  private int blackPixels;
  private List<Point> points;

  public List<Point> getPoints() {
    return new ArrayList<>(points);
  }
}
Location.java
@Data
public class Location {
  private Scan scan;
  private Mat srcMat;
  private Mat grayMat;
}
OpenCvUtils.java
private static final int MINIMUM_SIMILARITY_COORDINATE_DIFFERENCE = 300;
private static final List<Integer> K_SIZES = List.of(3, 5, 7, 9, 11, 13, 15);
/**
* 获取定位点(多线程情况下获取定位点,OpenCV 可能会报错,可以多重试几次)
*
* @param sourceImage 图片文件
* @param width 读取定位点原图的宽度
* @param height 读取定位点原图的高度
* @param points 矫正的定位点信息(矫正时过滤定位点需要)
* @param pointCount 定位点个数
* @return 定位点信息
*/
@SneakyThrows
public static Location getForLocation(
File sourceImage, int width, int height, List<Point> points, Integer pointCount) {
if (!FileUtils.isImage(sourceImage.getName())) {
throw new IllegalArgumentException("不是图片无法获取定位信息");
}
if (pointCount == null) {
pointCount = CollUtil.size(points);
}
BufferedImage old = ImageIO.read(sourceImage);
BufferedImage outputImage = new BufferedImage(width, height, BufferedImage.TYPE_INT_RGB);
// 使用图像处理工具进行尺寸调整
Graphics2D graphics2D = outputImage.createGraphics();
graphics2D.setRenderingHint(
RenderingHints.KEY_INTERPOLATION, RenderingHints.VALUE_INTERPOLATION_BILINEAR);
graphics2D.drawImage(old, 0, 0, width, height, null);
graphics2D.dispose();
String parent = sourceImage.getParent();
String openCv = SystemUtils.buildPath(parent, "openCv", sourceImage.getName());
File openCvFile = new File(openCv);
openCvFile.deleteOnExit();
FileUtil.touch(openCvFile);
ImageIO.write(outputImage, Objects.requireNonNull(FileUtils.getType(openCvFile)), openCvFile);
Mat source = Imgcodecs.imread(openCv, Imgcodecs.IMREAD_COLOR);
Pair<Mat, List<Point>> grayMatPoints = detectBlackSquares(source, points);
if (!pointCount.equals(grayMatPoints.getRight().size())) {
// 从图片中获取的定位点数量不对
String imageDenoising;
// 使�用不同的滤波器内核大小对图片去噪后重新获取定位点
for (Integer ksize : K_SIZES) {
imageDenoising = imageDenoising(new File(openCv), ksize);
Mat imread = Imgcodecs.imread(imageDenoising, Imgcodecs.IMREAD_COLOR);
grayMatPoints = detectBlackSquares(imread, points);
if (pointCount.equals(grayMatPoints.getRight().size())) {
FileUtil.del(imageDenoising);
break;
}
FileUtil.del(imageDenoising);
}
}
Location location = new Location();
location.setSrcMat(source);
location.setGrayMat(grayMatPoints.getLeft());
Scan scan = new Scan();
scan.setPoints(grayMatPoints.getRight());
location.setScan(scan);
return location;
}
/**
* 使用中值滤波进行图片去噪
*
* @param file 去噪的图片
* @param ksize 滤波器内核的大小,必须是 正的奇数(如 3, 5, 7 等)。
* @return 去噪后的图片位置
*/
private static String imageDenoising(File file, int ksize) {
String filePath = file.getAbsolutePath();
Mat image = Imgcodecs.imread(filePath);
Mat grayImage = new Mat();
Imgproc.cvtColor(image, grayImage, Imgproc.COLOR_BGR2GRAY);
Imgproc.medianBlur(grayImage, grayImage, ksize);
String denoisingImage = TempDirUtils.denoisingImage(file.getName());
File denoisingFile = new File(denoisingImage);
FileUtil.touch(denoisingFile);
Imgcodecs.imwrite(denoisingImage, grayImage);
return denoisingFile.getAbsolutePath();
}
/**
* 读取出灰度图片和定位点信息
*
* @param src 图片信息
* @param points 原图定位点信息(过滤读取矫正图片的定位点时使用)
* @return 灰度图信息和定位点信息
*/
private static Pair<Mat, List<Point>> detectBlackSquares(Mat src, List<Point> points) {
List<Point> locations = new ArrayList<>();
if (src.empty()) {
log.error("读取的图片为空!");
return Pair.of(null, locations);
}
Mat gray = new Mat();
Imgproc.cvtColor(src, gray, Imgproc.COLOR_BGR2GRAY);
Mat binaryImage = new Mat();
Imgproc.threshold(gray, binaryImage, 200, 255, Imgproc.THRESH_BINARY_INV);
List<MatOfPoint> contours = new ArrayList<>();
Mat hierarchy = new Mat();
Imgproc.findContours(
binaryImage, contours, hierarchy, Imgproc.RETR_EXTERNAL, Imgproc.CHAIN_APPROX_SIMPLE);
Map<Point, List<Rect>> pointMap = new HashMap<>();
for (MatOfPoint contour : contours) {
Rect rect = Imgproc.boundingRect(contour);
// 根据定位点的宽高在一定误差范围内判断是否为定位点
boolean isLocatingPoint =
rect.width >= 25 && rect.width <= 70 && rect.height >= 50 && rect.height <= 90;
if (isLocatingPoint) {
Mat roi = binaryImage.submat(rect);
double fill = (double) Core.countNonZero(roi) / roi.size().area();
if (CollUtil.isEmpty(points)) {
// 如果没有 points 则是读取原图定位点,原图定位点的黑色像素占比是很非常高的
if (fill < 0.95) {
continue;
}
}
if (CollUtil.isNotEmpty(points)) {
// 过滤矫正图片读取出来的定位点
for (Point point : points) {
// 矫正图片的定位点中心点与原图的定位点相距 300 像素以内则判定为矫正图片的定位点位置
if (Math.abs(point.x - (rect.x + rect.width / 2.0))
<= MINIMUM_SIMILARITY_COORDINATE_DIFFERENCE
&& Math.abs(point.y - (rect.y + rect.height / 2.0))
<= MINIMUM_SIMILARITY_COORDINATE_DIFFERENCE) {
// 矫正图片的定位点可能因多种原因(打印、摩擦等)导致定位点的黑色像素占比减少
if (fill < 0.83) {
continue;
}
pointMap.putIfAbsent(point, new ArrayList<>());
pointMap.get(point).add(rect);
break;
}
}
} else {
// 读取的是原图定位点,取定位点中间位置
locations.add(new Point(rect.x + rect.width / 2.0, rect.y + rect.height / 2.0));
}
}
}
Map<Point, Point> pointPointMap = new LinkedHashMap<>();
pointMap.forEach(
((point, rects) -> {
Rect maxRect = rects.get(0);
// 进一步过滤定位点,从矫正图片的定位点中找出离原图定位点最近的定位点
if (rects.size() != 1) {
Mat maxMat = binaryImage.submat(maxRect);
double max = (double) Core.countNonZero(maxMat) / maxMat.size().area();
for (int i = 1; i < rects.size(); i++) {
Rect nextRect = rects.get(i);
Mat nextMat = binaryImage.submat(nextRect);
double fill = (double) Core.countNonZero(nextMat) / nextMat.size().area();
if (fill > max) {
maxRect = nextRect;
continue;
}
if (fill == max) {
if (Math.abs(point.x - (maxRect.x + maxRect.width / 2.0))
> Math.abs(point.x - (nextRect.x + nextRect.width / 2.0))) {
maxRect = nextRect;
}
}
}
}
pointPointMap.put(
point, new Point(maxRect.x + maxRect.width / 2.0, maxRect.y + maxRect.height / 2.0));
}));
if (CollUtil.isNotEmpty(points)) {
for (Point point : points) {
Point matched = pointPointMap.get(point);
if (matched != null) {
locations.add(matched);
}
}
}
return Pair.of(gray, locations);
}
从原图定位点中去掉没有在矫正图片中获取出的对应的定位点
OpenCvUtils.java
  /**
   * 过滤原图定位点
   * @param points 原图定位点
   * @param scanPoints 从矫正图片中获取的定位点
   * @return 与矫正图片中获取的定位点一一对应的原图定位点
   */
  public static List<Point> getSimilarPoints(List<Point> points, List<Point> scanPoints) {
    List<Point> newPoint = new ArrayList<>();
    for (Point scanPoint : scanPoints) {
      for (Point point : points) {
        if (OpenCvUtils.isSimilarPoints(scanPoint, point)) {
          newPoint.add(point);
        }
      }
    }
    return newPoint;
  }

  public static boolean isSimilarPoints(Point point, Point other) {
    return Math.abs(point.x - other.x) <= MINIMUM_SIMILARITY_COORDINATE_DIFFERENCE
        && Math.abs(point.y - other.y) <= MINIMUM_SIMILARITY_COORDINATE_DIFFERENCE;
  }
矫正图片
使用原图定位点和矫正图片定位点一一对应进行图片的矫正。
OpenCvUtils.java
  /**
   * 矫正图片
   *
   * @param points 原定位点
   * @param location 扫描后的图片信息,主要是需要矫正图片的 Mat 信息
   * @param scanPoints 从矫正图片中获取的定位点
   * @return 矫正后图片的 Mat 信息
   */
  public static Mat transformImage(
      List<Point> points, Location location, List<Point> scanPoints) {
    Mat correctedMat = new Mat();
    if (scanPoints.size() == 3) {
      MatOfPoint2f src = new MatOfPoint2f();
      src.fromList(scanPoints);
      MatOfPoint2f dst = new MatOfPoint2f();
      dst.fromList(points);
      // 计算仿射变换矩阵
      Mat affineTransform = Imgproc.getAffineTransform(src, dst);
      // 对图像进行仿射变换
      Imgproc.warpAffine(
          location.getSrcMat(),
          correctedMat,
          affineTransform,
          location.getSrcMat().size(),
          Imgproc.INTER_LINEAR,
          Core.BORDER_REPLICATE);
    } else if (scanPoints.size() == 4) {
      // 计算透视变换矩阵
      Mat perspectiveTransform =
          Imgproc.getPerspectiveTransform(
              Converters.vector_Point2f_to_Mat(scanPoints),
              Converters.vector_Point2f_to_Mat(points));
      // 对图像进行透视变换
      Imgproc.warpPerspective(
          location.getSrcMat(),
          correctedMat,
          perspectiveTransform,
          location.getSrcMat().size(),
          Imgproc.INTER_LINEAR,
          Core.BORDER_REPLICATE);
    } else {
      MatOfPoint2f srcPoints = new MatOfPoint2f();
      srcPoints.fromList(scanPoints);
      MatOfPoint2f dstPoints = new MatOfPoint2f();
      dstPoints.fromList(points);
      Mat perspectiveMatrix = Calib3d.findHomography(srcPoints, dstPoints);
      // 对图像进行透视变换
      Imgproc.warpPerspective(
          location.getSrcMat(),
          correctedMat,
          perspectiveMatrix,
          location.getSrcMat().size(),
          Imgproc.INTER_LINEAR,
          Core.BORDER_REPLICATE);
    }
    return correctedMat;
  }
保存矫正后的图片
String correctImage = SystemUtils.buildPath(filePath, "correct", "correctImage.png");
FileUtil.touch(correctImage);
Imgcodecs.imwrite(correctImage, correctedMat);
代码例子
- 读取原图定位点。
- 读取矫正图片定位点。
- 从原图定位点中去掉从矫正图片定位点没有找到的对应的定位点,使原图的定位点与矫正图片的定位点一一对应。
- 矫正图片。
- 保存矫正的图片。